User manualEverything, tab by tab.
Getting started
| Step | What to do |
|---|---|
| 1 · Install | Run the installer, then restart DaVinci Resolve. |
| 2 · Add the node | Color page › Effects › TColor. Drag it onto a node. |
| 3 · Open the panel | Inspector › Settings: tick Open TColor UI. |
| 4 · Colour Science | Pick the space the node works in - usually DaVinci WG / Intermediate inside a colour-managed or CST project, or sRGB / Rec.709. Match Resolve (once) copies the project's timeline space one time. The ✓ marks the space in use. A new node takes your last choice. Nothing changes when you change clips. |
| 5 · Each tab as a plugin | Want only Curves? Use TCurves (or any other "T<tab>") - the same tab, on its own. |
| 6 · Overlay | View › Viewer Overlay › Open FX Overlay must be on for the pickers (the plugin turns it on for you). |
The panel - things that work on every tab
| Control | How it works |
|---|---|
| Tabs | Click a tab to open its tool. Two fingers left / right on the trackpad slides to the next / previous tool. Drag a tab to reorder. A tab reading "· off" (Teal / Orange · off) is switched off - ⌘D switches the tab on / off. |
| Sliders | Drag. Double-click the slider or its name to reset it. Hold ⌥ Option while dragging Exposure / Highlights / Shadows / Whites / Blacks to see the finder view (what is clipping, bright or dark). |
| Blend button | Click Normal · RGB to open the list. Left: blend modes (Photoshop's list and order). Right: Color Mode (RGB, Subtractive Mix, Lab, HCL, Custom Channel) and its Channels. The list stays open while you click in the plugin panel, so you can try modes one after another. It closes with Esc, a click on a green heading (Blend, Color Mode, Channels), the button again, or a click in Resolve. |
| Opacity | Drag left / right on the number to scrub. Double-click the number to type a value. Double-click the name "Opacity:" to reset to 100%. Below 100% the number turns green, so a tab left at 0% is easy to spot. |
| Undo / Redo | Each tab keeps its own history (50 steps). Click Undo / Redo, or press ⌘Z / ⇧⌘Z with the mouse over the panel. Elsewhere ⌘Z is Resolve's. |
| Reset (next to blend) | Blend back to Normal · RGB · 100%. |
| 👁 Channels | See the picture through one channel of the colour mode, like Photoshop's Channels panel. Viewer only - never rendered. |
| Reset Tab | Resets this tab's tool. Keeps its blend mode. |
| Reset All | Next to Done. Resets every tab, including the blend modes. |
| Auto-hide | Bottom left of every tab. The panel hides when you select another node or clip, or go full screen, and comes back with its node. |
| Done | Closes the panel. / brings it back. |
| Size and place | Drag the panel where you want it and drag a corner to size it - everything inside scales together. It remembers the spot, and follows Resolve's window when that moves or resizes. |
Keyframes (per tab)
| Control | How it works |
|---|---|
| ◆ Add Key | Keys this tab at the playhead. |
| Delete Key / Clear Keys | Removes the key under the playhead / every key of this tab. |
| The key line | Green with diamonds = this tab has keys. Pale green = no keys yet. Pale red = this tool cannot be keyed. |
| [ ] | Jump to the tab's previous / next key. |
Input LUT
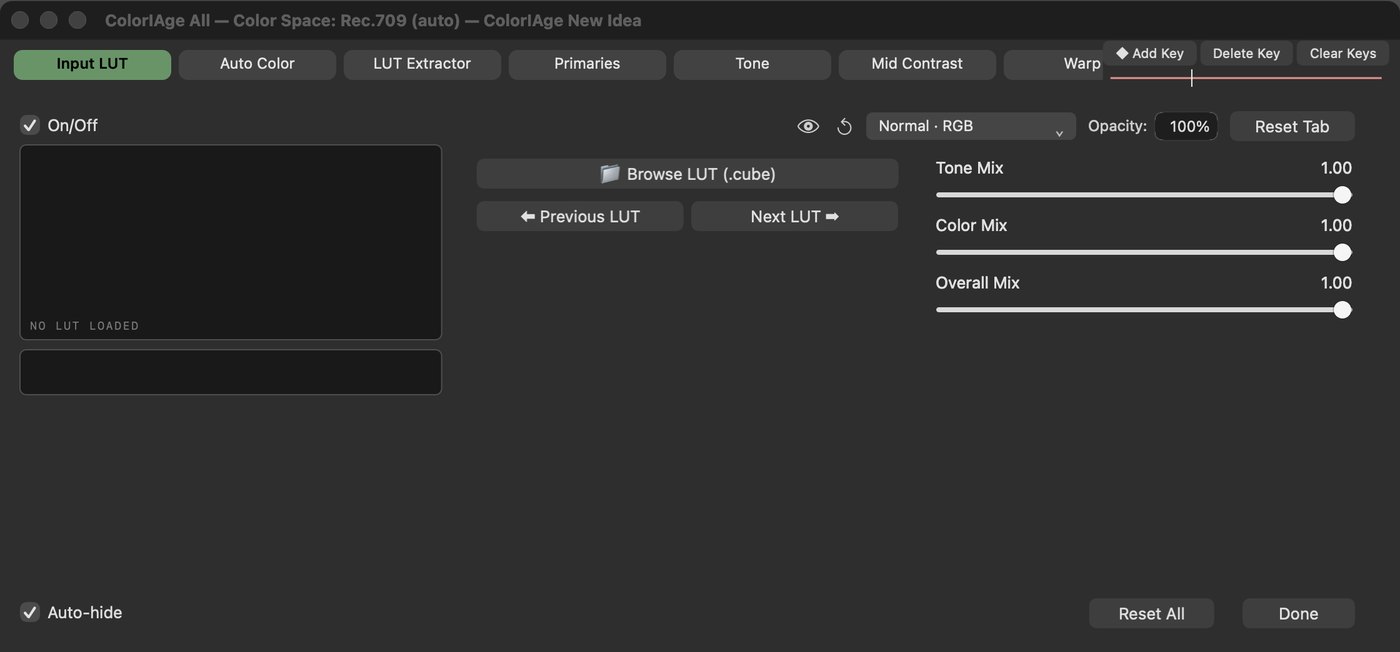
Loads a .cube LUT as the first step of the grade.
| On/Off | The LUT on or off. |
| 📁 Browse LUT | Choose a .cube file. |
| ⬅ Previous / Next ➡ | Step through the other .cube files in the same folder. |
| Tone Mix | How much of the LUT's brightness and contrast. |
| Color Mix | How much of the LUT's colour. |
| Overall Mix | How much of the LUT. |
Auto Color
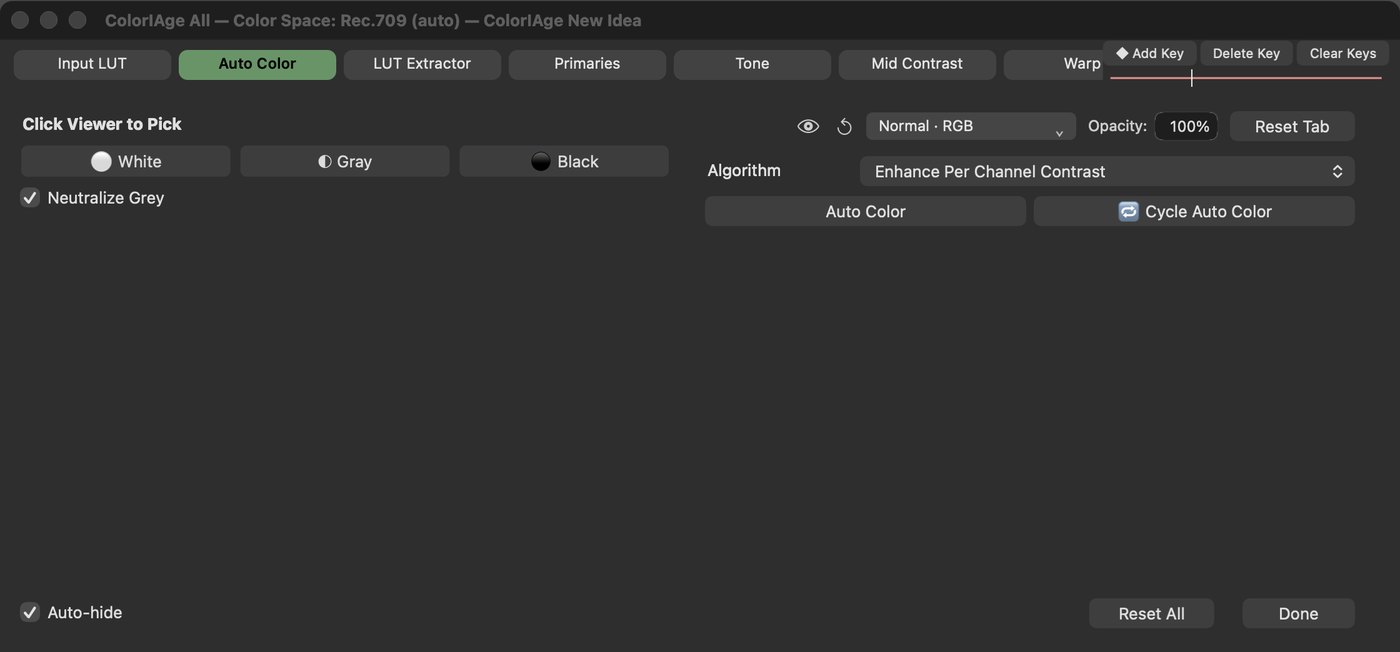
Balances the shot for you, or from points you pick.
| ⚪ White / ◐ Gray / ⚫ Black | Arm a picker, then click the viewer on what should be white, grey or black. Click the button again to stop. |
| Neutralize Grey | Also takes the colour out of the greys found. |
| Algorithm | Monochromatic Contrast · Per Channel Contrast · Find Dark & Light Colors · Brightness and Contrast. |
| Auto Color | Balance this frame. |
| 🔁 Cycle Auto Color | Tries the next algorithm and balances again. |
LUT Extractor
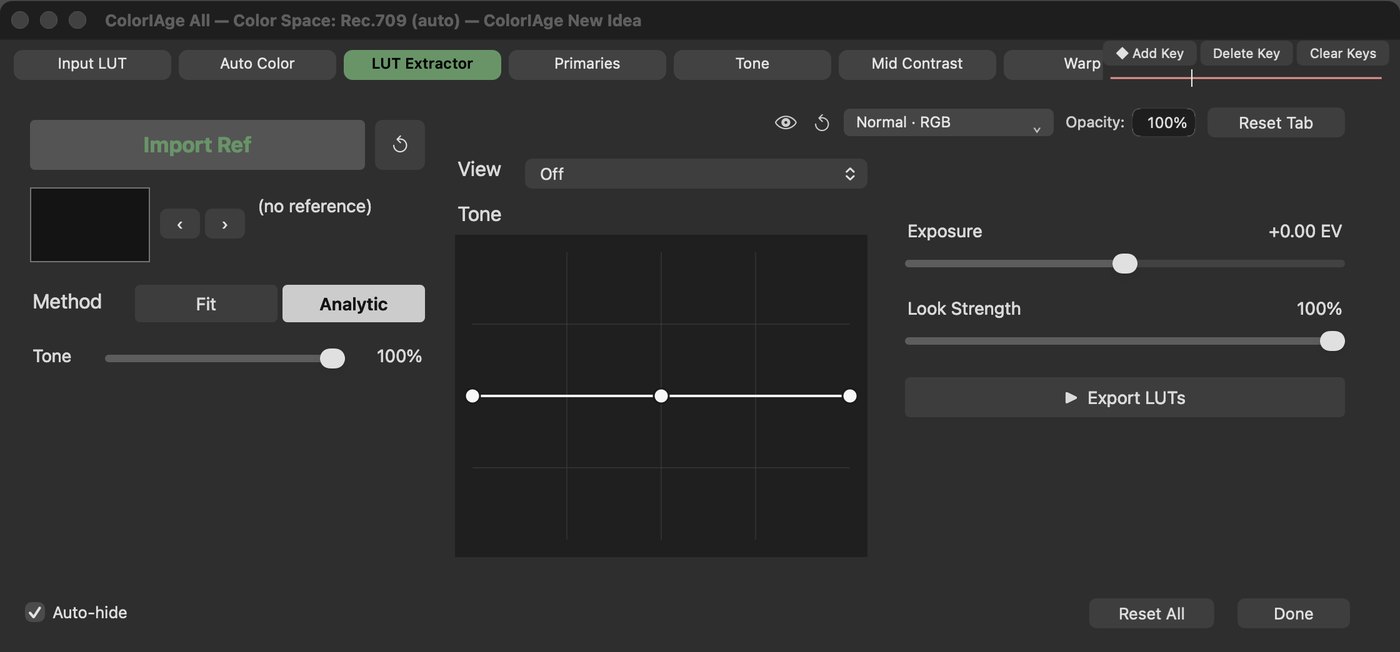
Take the look of a still and apply it - or export it.
| Reference | Choose the still. The look is taken straight away. |
| ⇧← ⇧→ | Previous / next image in the reference's folder. |
| Fit / Analytic | Fit: a 3D LUT fitted to the reference. Analytic: a measured, parametric look. |
| Tone | How much brightness and contrast to take. 0 = colour only. |
| View | Shows the reference in the viewer: ⌥R small, ⌘R full frame. Never rendered. |
| Camera LUTs | Export for a camera: choose the input (Rec.709, DWG, ACEScct, S-Log3, LogC, Apple Log…), Rec.709 or "same as input" out, 33 or 65 points. |
| Curve | Drag black, midtone and white points. |
| Export .cube | Writes five files: Correct, Over +1 / +2, Under −1 / −2. |
Match Look
Match the look of a reference still - as sliders you keep adjusting (the LUT Extractor makes a fixed LUT instead).
| Reference | Starts with the LUT Extractor's reference. Import Ref picks another; ‹ Previous / Next › or ⇧← ⇧→ step through its folder. Every new reference is matched at once. |
| Match Look | Match again - for example after moving to another frame. |
| Ref Off · Small · Full Frame | The reference in the viewer (the same setting as the LUT Extractor's). ⌥R / ⌘R. |
| Tone: Fade · Level · Contrast | 50 = as matched. |
| Colour: Saturation · Shadow Tint · Highlight Tint | 100 = as matched; less or more of it. |
| Signature: Colour A · Colour B · Warmth | The reference's two strongest colour shifts and its warmth. 100 = as matched. |
| Master | How much of the whole look. |
Primaries
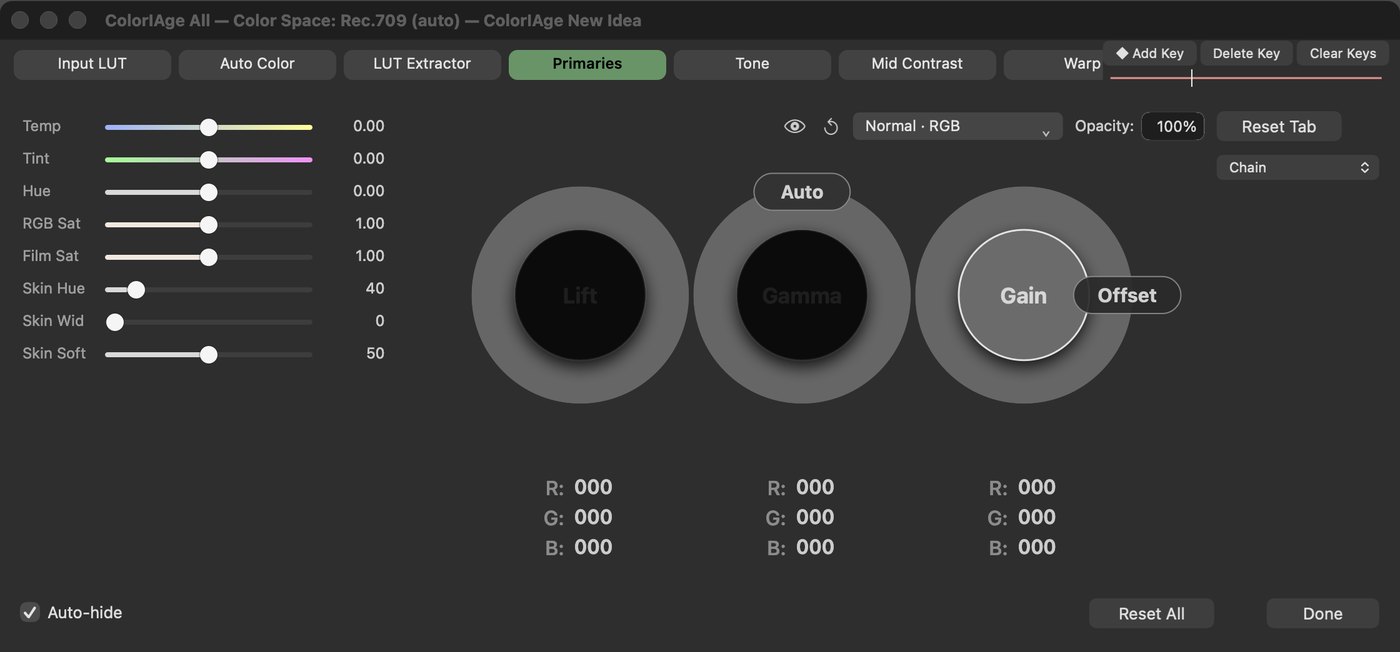
The colour wheels and white balance.
| Trackball | Drag the trackball for colour. ⇧ Shift = fine. |
| Wheels (the ring) | Turn the ring for level (darker / brighter). Hold ⌥ Option while dragging to find points (what clips or crushes). Double-click resets. |
| Numbers under the wheels | Click and type exact values: each dot's Hue (0-360) and Sat (0-100). In HCL one number per wheel: Hue in degrees (−90 to +90), Chroma and Lightness 0-100 (50 = unchanged). Lab: b, a, L. Custom Channel: C, M, Y. |
| Offset pill | The third wheel becomes Offset. Gain keeps its values until you switch back. |
| Chain / Blend / Split | Chain: the classic lift-gain-gamma. Blend: each wheel in its own tonal zone. Split: Lightroom's Color Grading - colour dots plus Shadows / Midtones / Highlights sliders under the wheels. Split is not offered in Lab, HCL or Custom Channel (those modes use the rings). Reset left of the menu resets the wheels only. |
| Temp / Tint / Hue | White balance and a hue turn. |
| RGB Sat / Film Sat | Plain saturation / film-dye saturation (richer and darker). |
| Skin Hue / Width / Soft | Keeps skin out of the wheels' colour. Width 0 = off. |
Curves (CC by numbers)
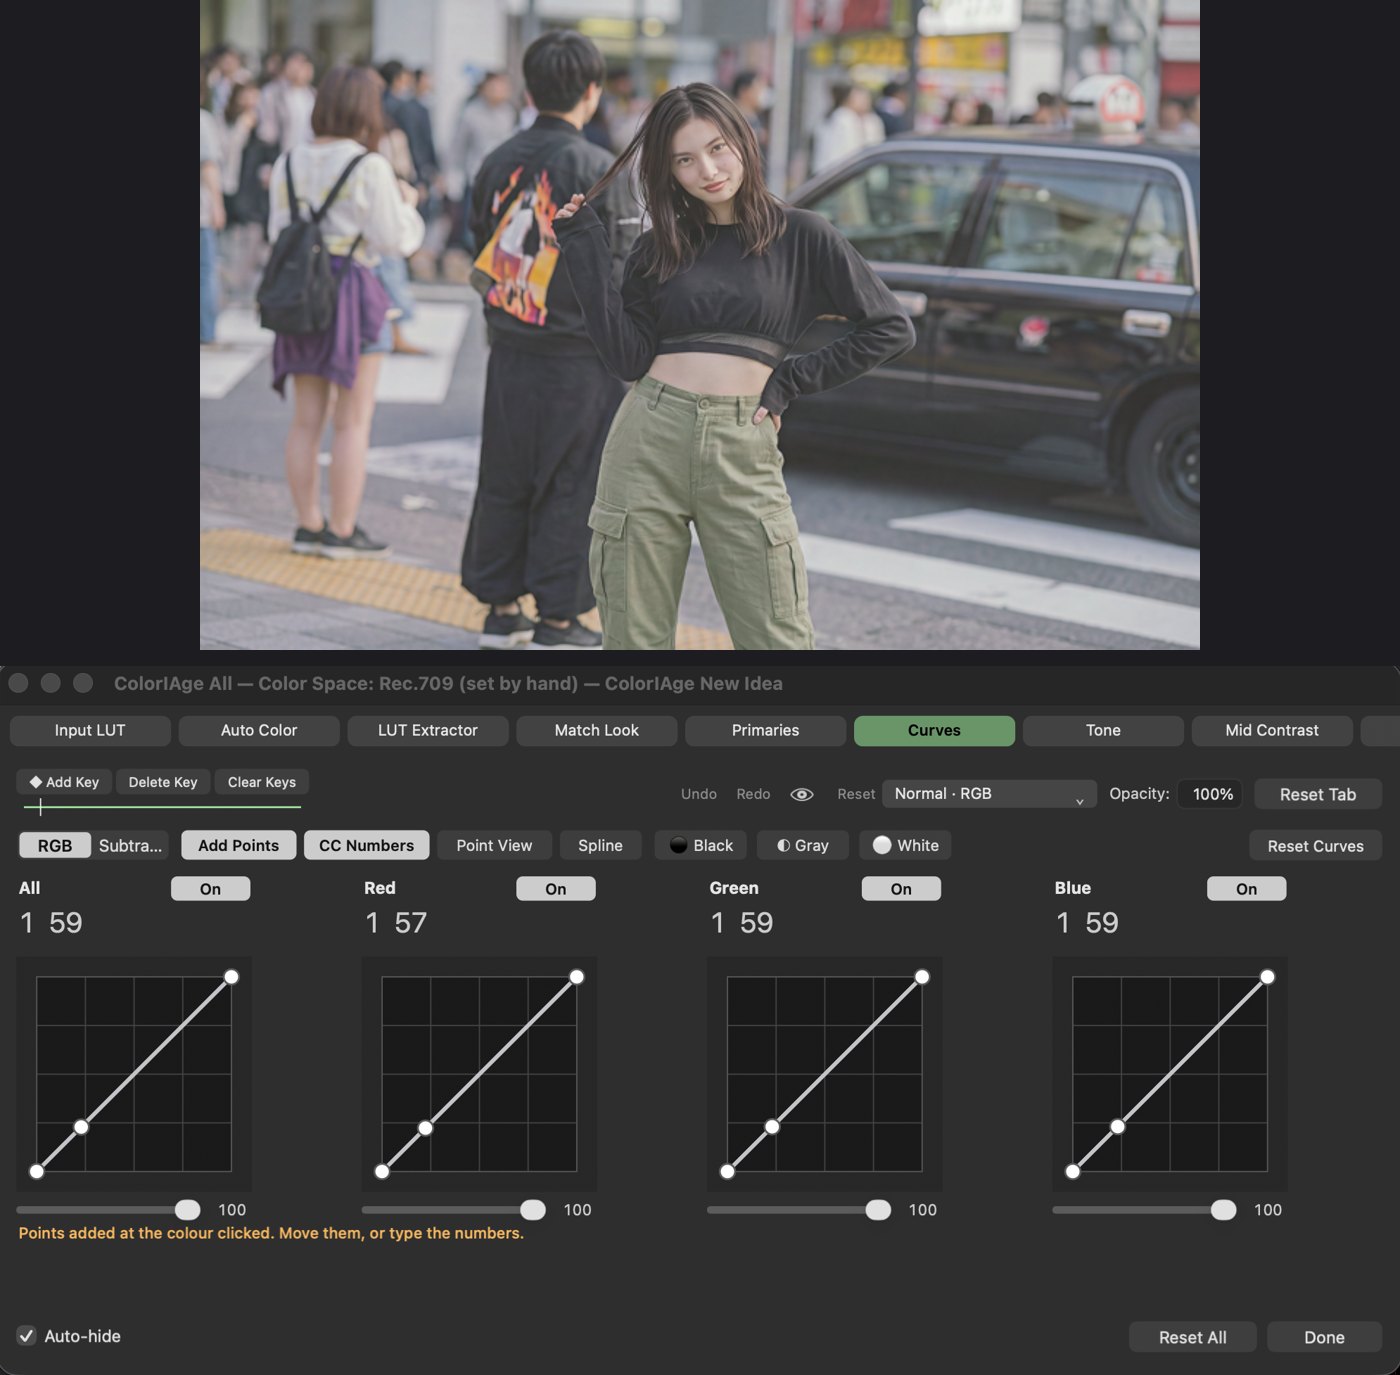
Tone curves, Photoshop style.
| RGB | Subtractive Mix | All + Red / Green / Blue curves, or All + Cyan / Magenta / Yellow / K curves. |
| Points | Click the curve to add, drag to move, double-click a point to delete it. Double-click a curve's name resets that curve. Reset Curves resets them all. |
| Add Points | On by default. Click the viewer: a mark with that colour's numbers goes on the picture, and a point on every curve showing. Drag the mark to move it; double-click it to remove it and its points. |
| CC Numbers | On by default. The mark's numbers show above each curve: click one and type a value (0-255, or % in Subtractive Mix) to move exactly that colour. |
| Point View | A tag on the viewer with the clicked point's level and each curve's number there. |
| Spline | Tangent handles on the points. |
| ⚫ Black · ◐ Gray · ⚪ White | Set the black, grey or white point from the viewer. |
| Amount (under each curve) | 100 = the curve as drawn, 0 = straight. The points stay, pulled onto the line (your drawn curve shows dashed). Key it to fade a curve in or out. Double-click = 100. |
| On ticks | Each curve on or off. Off keeps its points. |
Tone
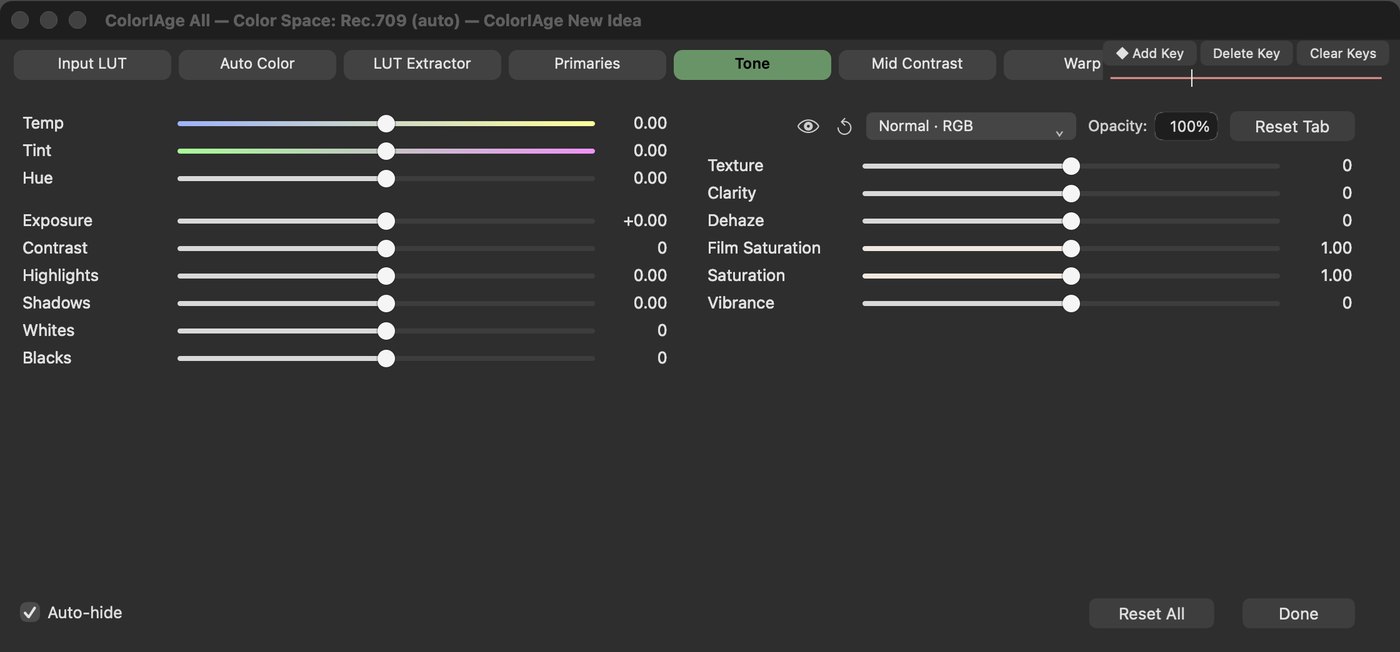
Lightroom-style light and presence.
| Temp / Tint / Hue | White balance and a hue turn. |
| Exposure | In stops. |
| Contrast | More or less contrast. |
| Highlights / Shadows | Bring back bright areas / open up dark areas, without halos. |
| Whites / Blacks | Set the white and black points. |
| Texture / Clarity / Dehaze | Fine detail / mid-size contrast / cuts through haze. |
| Film Saturation / Saturation / Vibrance | Film-dye saturation / plain / boosts the dull colours more. |
Mid Contrast
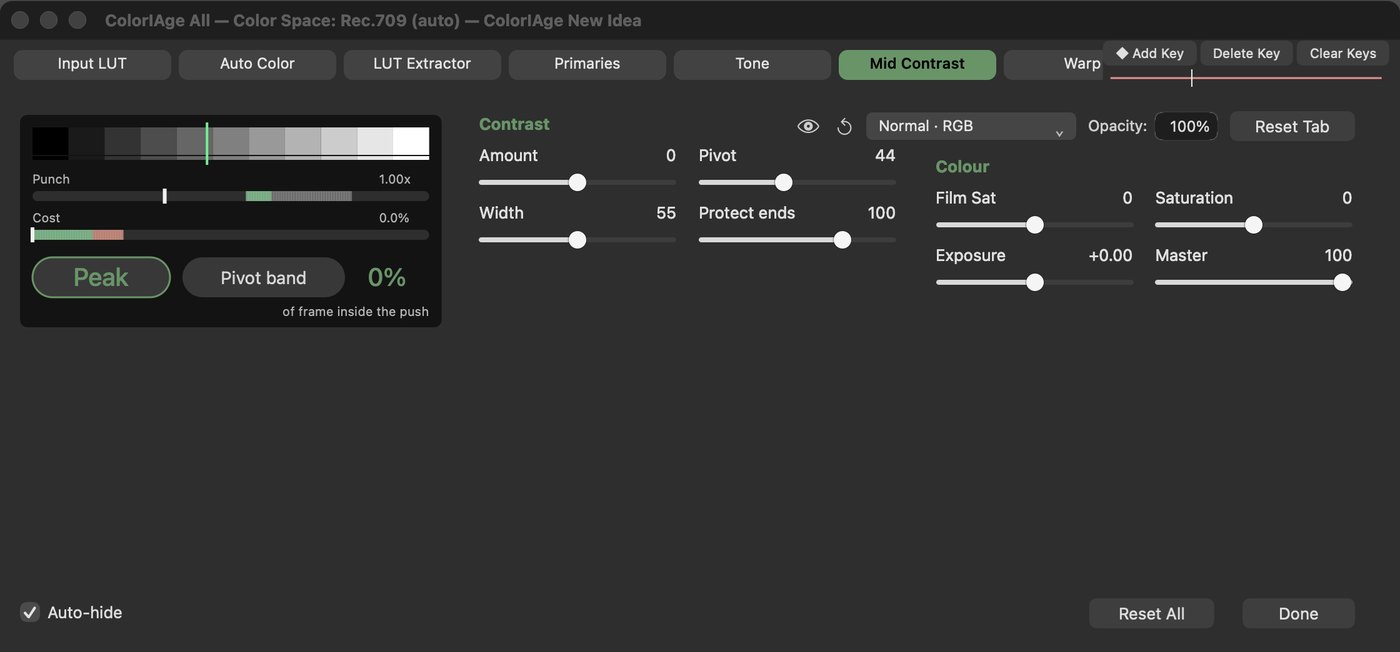
Contrast in the mids only; the ends stay put.
| Amount | + punches, − flattens. |
| Pivot · Peak | The grey the contrast turns around. Peak snaps it to the frame's most common grey - it stays lit green while the pivot is there. |
| Width / Protect ends | How wide a band / keeps blacks and whites in place. |
| Film Sat / Saturation / Exposure | Colour where the contrast works. |
| Master | How much of the tool. |
| Pivot Band \ | Shows the pixels inside the push, green on grey. Viewing aid only. |
Warp
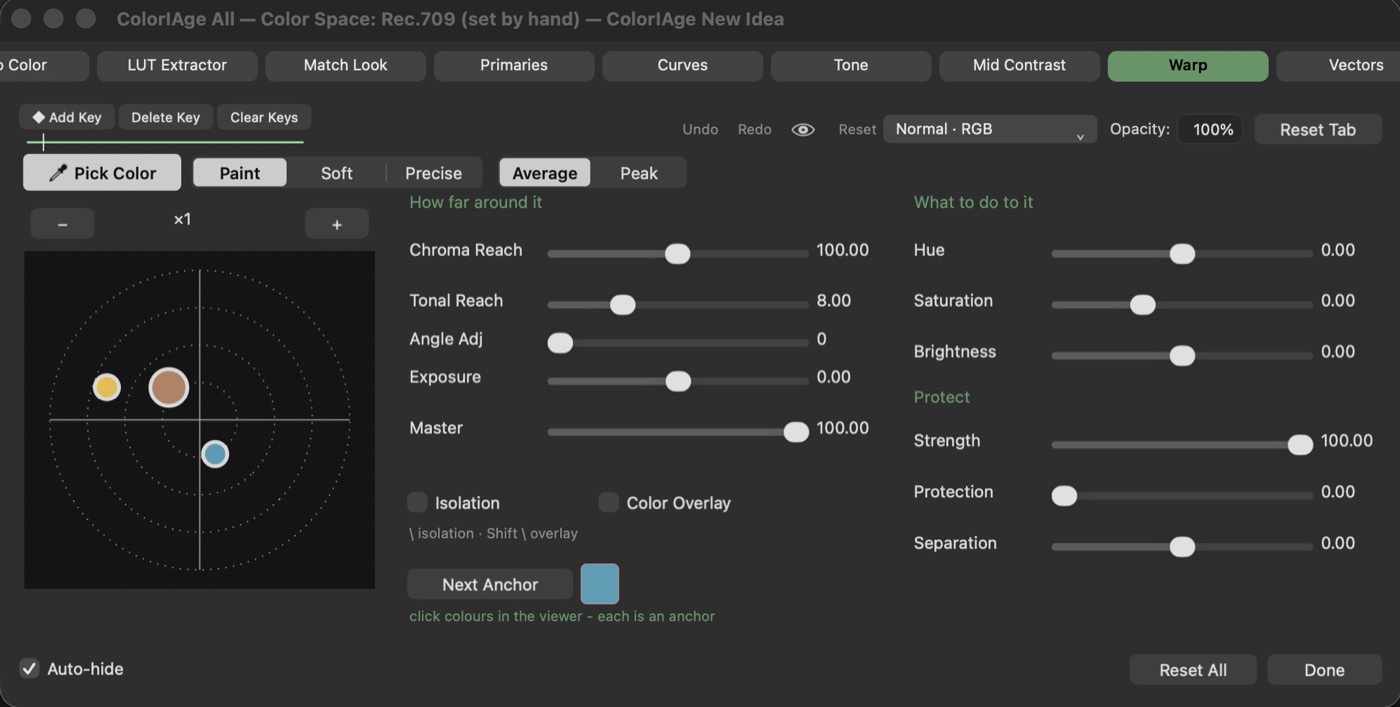
Pick a colour in the viewer and move it on the colour wheel.
| Pick Color | Always on in this tab: click the viewer to drop an anchor on that colour. Esc turns the picker off. |
| Paint · Soft · Precise | Paint (default): the original Warp - a soft brush of colour, greys take the push too ("grab the arm, warm the scene"). Soft: turns the colours it catches, greys stay grey. Precise: exact. |
| Average · Peak | Average: the pixels under the click, blended. Peak: the most colourful pixel there. |
| The wheel | Your anchors. Double-click an anchor to put it back. − / + zoom. |
| Chroma Reach · Tonal Reach · Angle Adj | How far around the anchor the change reaches (Chroma Reach starts at 100). Angle Adj 0 slides the colour, 100 turns it round the wheel; in between, a smooth blend of the two. |
| Hue · Saturation · Brightness | What to do to the colour. |
| Strength · Protection · Separation | Protect the colours next to it. |
| Next Anchor | Select the next anchor; its values load into the sliders. |
| \ / ⇧\ | Isolation / Color Overlay: see what the anchor catches. |
Vectors
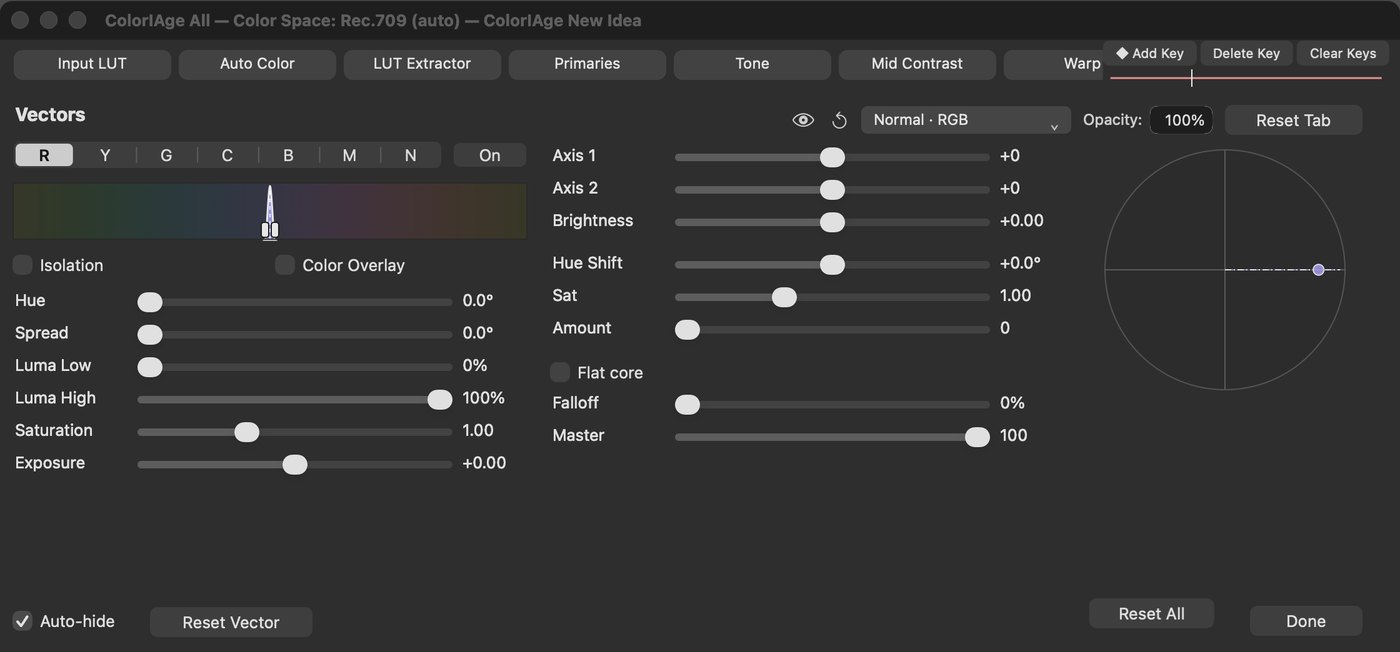
Pick a band of hues and push it.
| R · Y · G · C · B · M · N | Choose the colour band to work on. On switches it on. |
| Hue · Spread | Where the band sits and how wide it is (the strip shows it). |
| Luma Low · Luma High | The band only catches pixels in this brightness range, with a soft edge - skin apart from a darker wood of the same hue. |
| Saturation · Exposure | The whole tab: saturation and exposure after the push. |
| Axis 1 · Axis 2 · Brightness | Push the colours along the two axes and brighten or darken them. |
| Hue Shift · Sat · Amount | Turn the band's hue, its saturation, how much. |
| Flat core · Falloff | A flat centre, and how softly the band fades out. |
| Master | How much of the tool. |
| Isolation · Color Overlay | See what the band catches (\, ⇧\). |
| Reset Vector | This band back to neutral. Double-click any slider to reset it. |
Secondaries
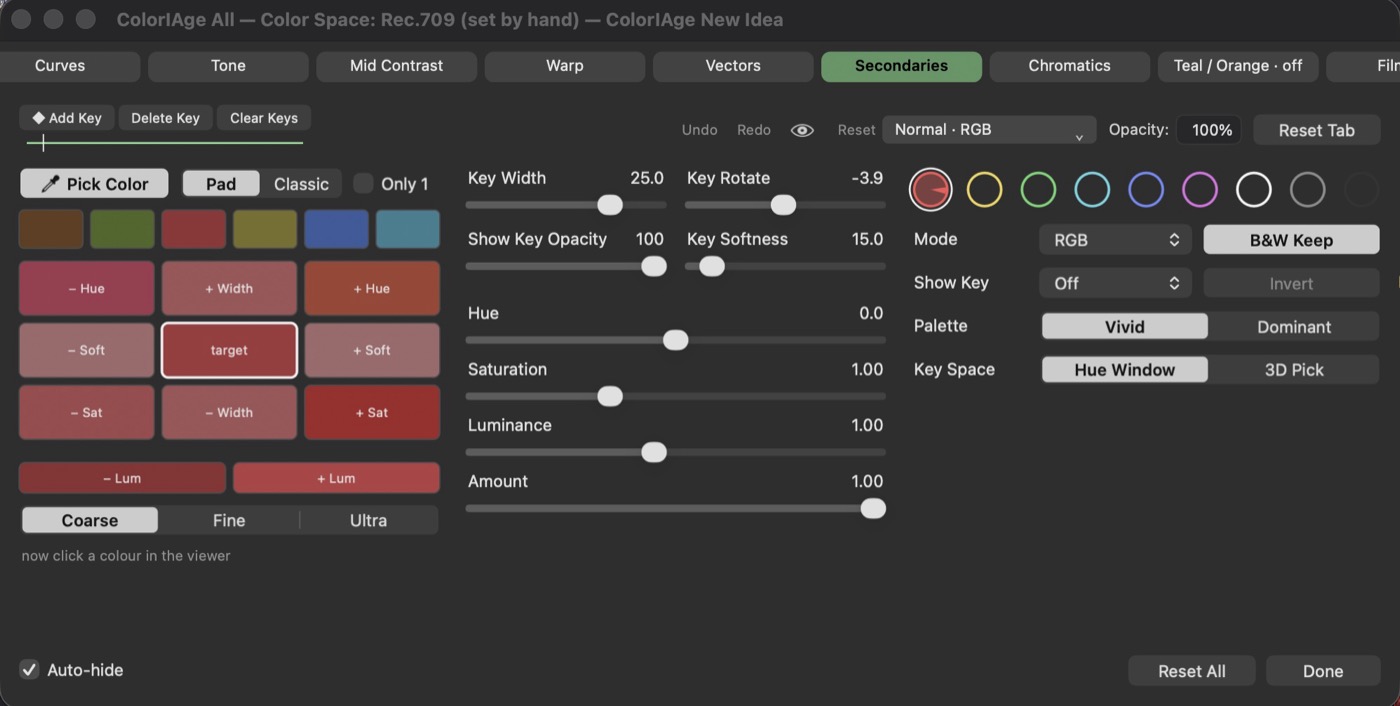
Nine sections: Red, Yellow, Green, Cyan, Blue, Magenta, Blacks, Neutrals, Whites.
| Pick Color | Always on in this tab: click the viewer and that colour's section is aimed at it. Only Esc turns it off; the button turns it back on. Each pick adds its section - tick Only 1 to keep just one. |
| Pad · Classic | The nudge pad, or the classic sliders. |
| The pad | ± Hue, ± Width, ± Soft, ± Sat, ± Lum around the target. Coarse / Fine / Ultra = step size. |
| Key Rotate · Width · Softness | Shape the key. |
| Hue · Saturation · Luminance · Amount | What to do to the section. |
| Colour circles | The sections: six colours, Blacks, Neutrals, Whites. |
| Mode · B&W Keep | RGB or Film · everything outside the keys goes black and white. |
| Show Key · Invert | See what the sections catch (every section that is on). Isolation shows black outside the key. \ and ⇧\ as shortcuts. The view goes away when you leave the tab or close the panel, and comes back with it. |
| Only 1 · › | Tick Only 1 to keep just the selected section on (the others are remembered, and come back when you untick). › steps the single mask through them. |
| Palette · Key Space | Vivid / Dominant colours · Hue Window / 3D Pick. |
Chromatics
Memory colours and film printer lights.
| The chips | Drag a chip to move that colour: skin, sky, foliage and more. |
| Skin / Sky / Foliage Luma · Sat | Brightness and saturation of each memory colour. |
| Smoothness · Neutral lock | How softly the moves blend · keeps greys grey. |
| Saturation · Master | The whole picture's saturation · how much of the tool. |
| Printer R / G / B | Film printer lights for the whole picture. |
Teal / Orange
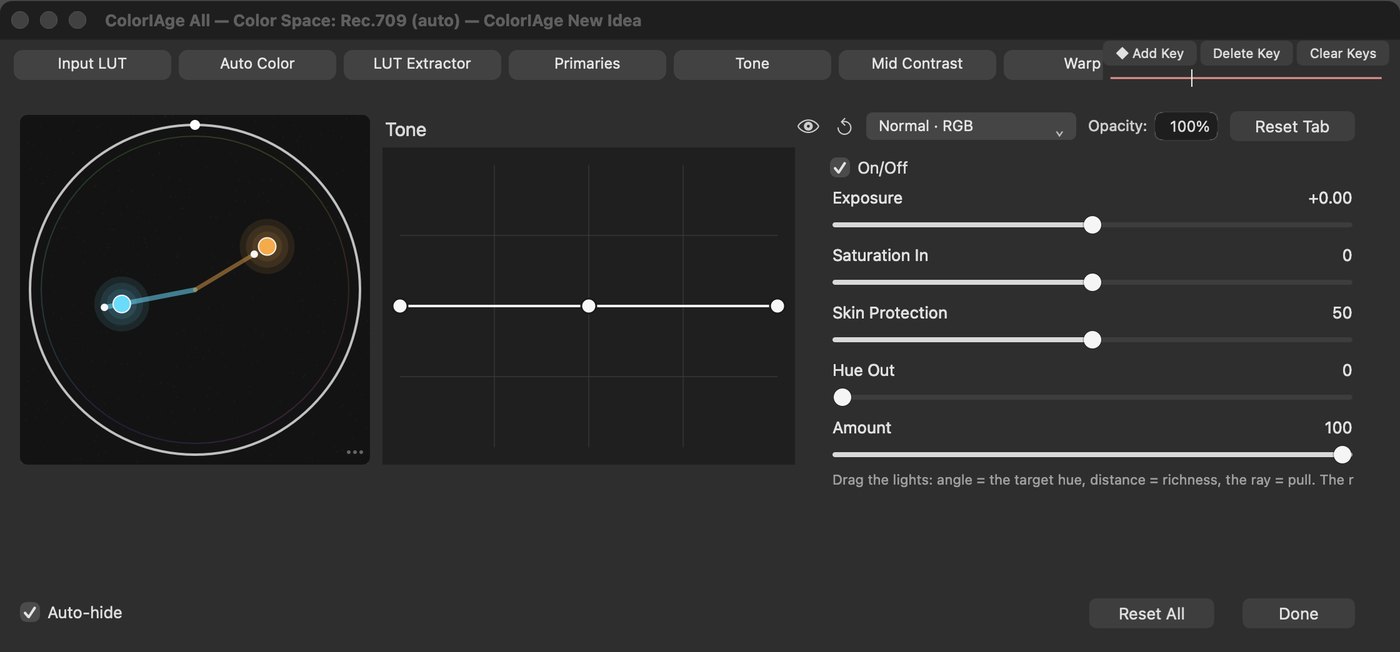
The blockbuster look: teal shadows, orange skin.
| The field (lights) | Drag a light: the angle is the target hue, the distance is richness, the ray is the pull. |
| The ring · Amount | How much of the look. The thin outer ring and the Amount slider are the same control. |
| Tone curve | Runs before the teal / orange look: drag the black, mid and white points. |
| On/Off | On by default. Off keeps every setting. |
| Exposure / Saturation In | Before the look. |
| Skin Protection | Keeps skin out of the look. |
| Hue Out | Turns every hue after the look. |
Film Sat
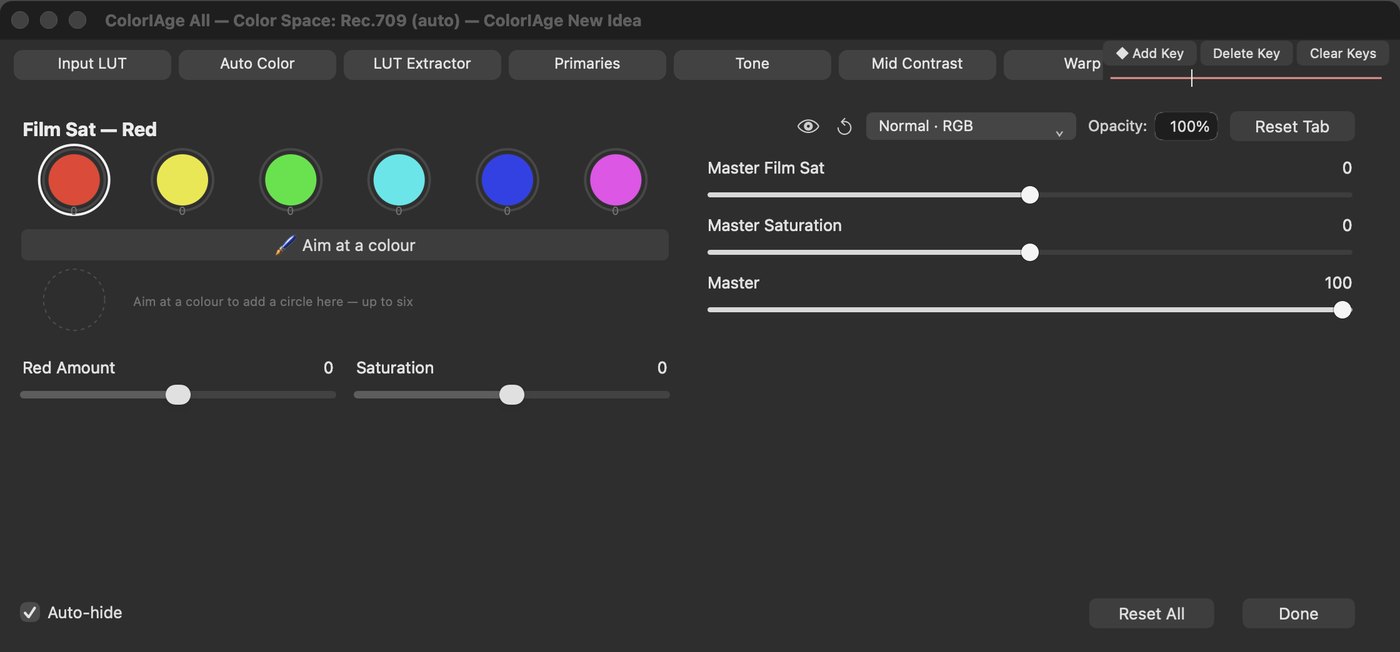
Saturation the way film dyes add it: richer colours also get darker.
| Aim at a colour | On by default: click the picture and a circle goes at that hue (up to six). Esc stops it. |
| Master Film Sat / Master Saturation | For every colour / the whole picture. |
| Per colour | "<Colour> Film Sat" and "<Colour> Saturation" for Red, Yellow, Green, Cyan, Blue, Magenta. |
| Master | How much of the tool. |
Telecine
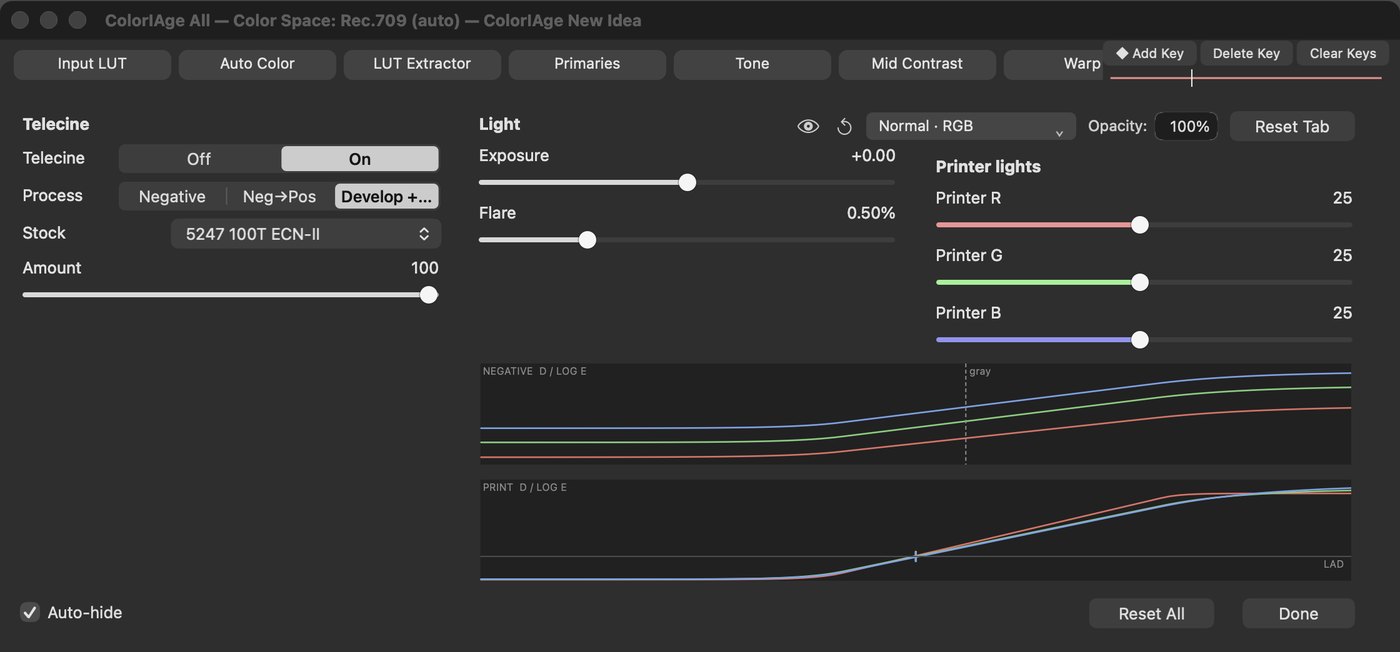
The 80s-90s film chain: a negative, developed and printed. Off by default - switch it On.
| Telecine Off | On | Off by default and after any reset. Off keeps every setting. |
| Process | Negative · Neg→Pos · Develop + Print (the full chain, chosen by default). |
| Stock | 5245 EXR 50D, 5247 100T, 5248 EXR 100T, 5297 250D, 5246 VISION 250D, 5296 / 5298 EXR 500T, 5279 VISION 500T. |
| Amount / Exposure / Flare | How much / onto the negative / lens and printer flare. |
| Printer R / G / B | Printer lights; 25 is home. |
Mixer
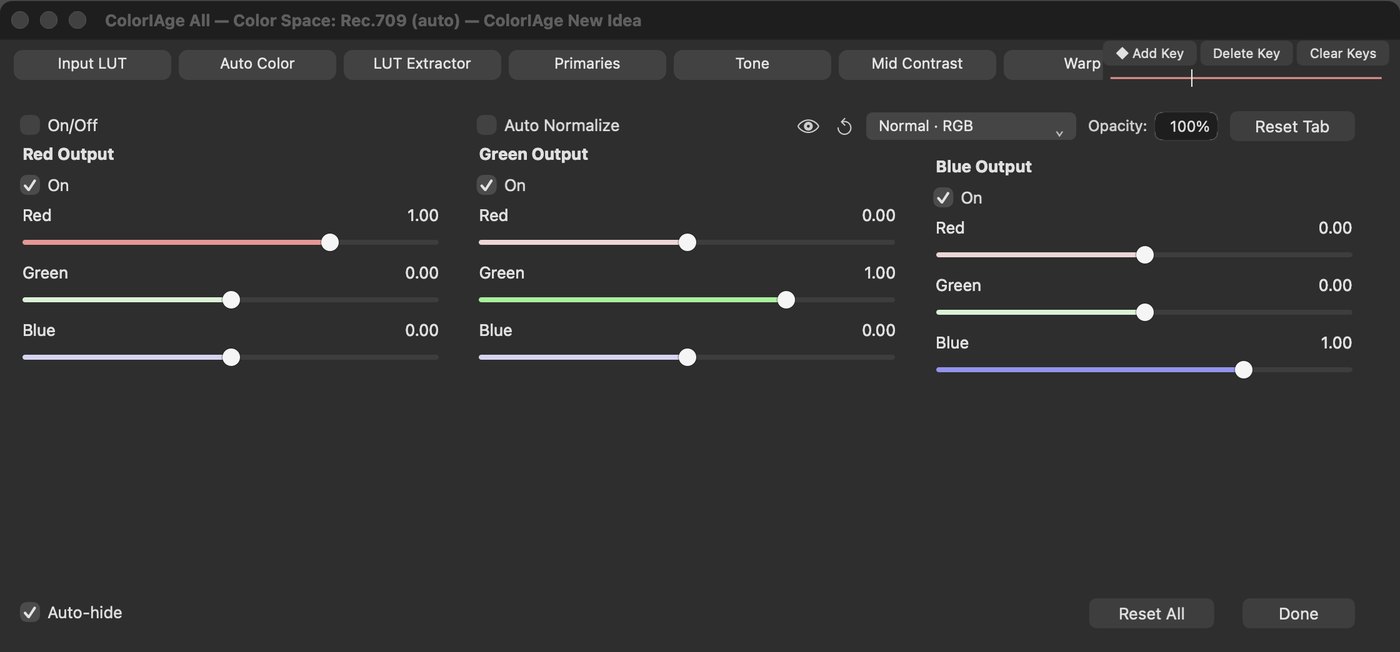
Channel mixer.
| Red / Green / Blue Output | How much red, green and blue go into each output. Each row has its own On. |
| Auto Normalize | Each row sums to 1, so brightness stays the same. |
Color management - three setups
Project Settings › Color Management in Resolve. The green box = the TColor Color Science to set.
Color Modes (in the blend list)
| RGB | Normal. Channels: Red, Green, Blue. |
| Subtractive Mix | Works in C M Y K. Channels: Cyan, Magenta, Yellow, Black. |
| Lab | Lightness separate from colour. Wheels: b, a, L. |
| HCL | Hue, Chroma, Lightness - with colour boost. Wheels: Hue, Chroma, Lightness (one number each). |
| Custom Channel | Photoshop Multichannel inks: C, M, Y. |
Playback, rendering and HDR
| Playback | While the playhead moves, the grade plays through a fast LUT. A paused frame is always drawn by the full engine - exact. |
| Deliver | Renders from the Deliver page always use the full engine. |
| Colour-managed / CST projects | Set the node's Colour Science to the timeline space (usually DaVinci WG / Intermediate). The plugin reads Resolve's output space too, so its numbers match what you see (sRGB, Gamma 2.4…). |
| HDR / Dolby Vision | Grade in HDR as usual - the plugin works in DWG. Its numbers (Curves, picks) are on an SDR scale, not nits: use Resolve's scopes for HDR levels. |